Making a Slit Scan Camera
5 22 Share TweetLooking for a fun new experiment? Like those old fashioned finish photos? Then let me introduce you to the wondrous world of slit scan photography.

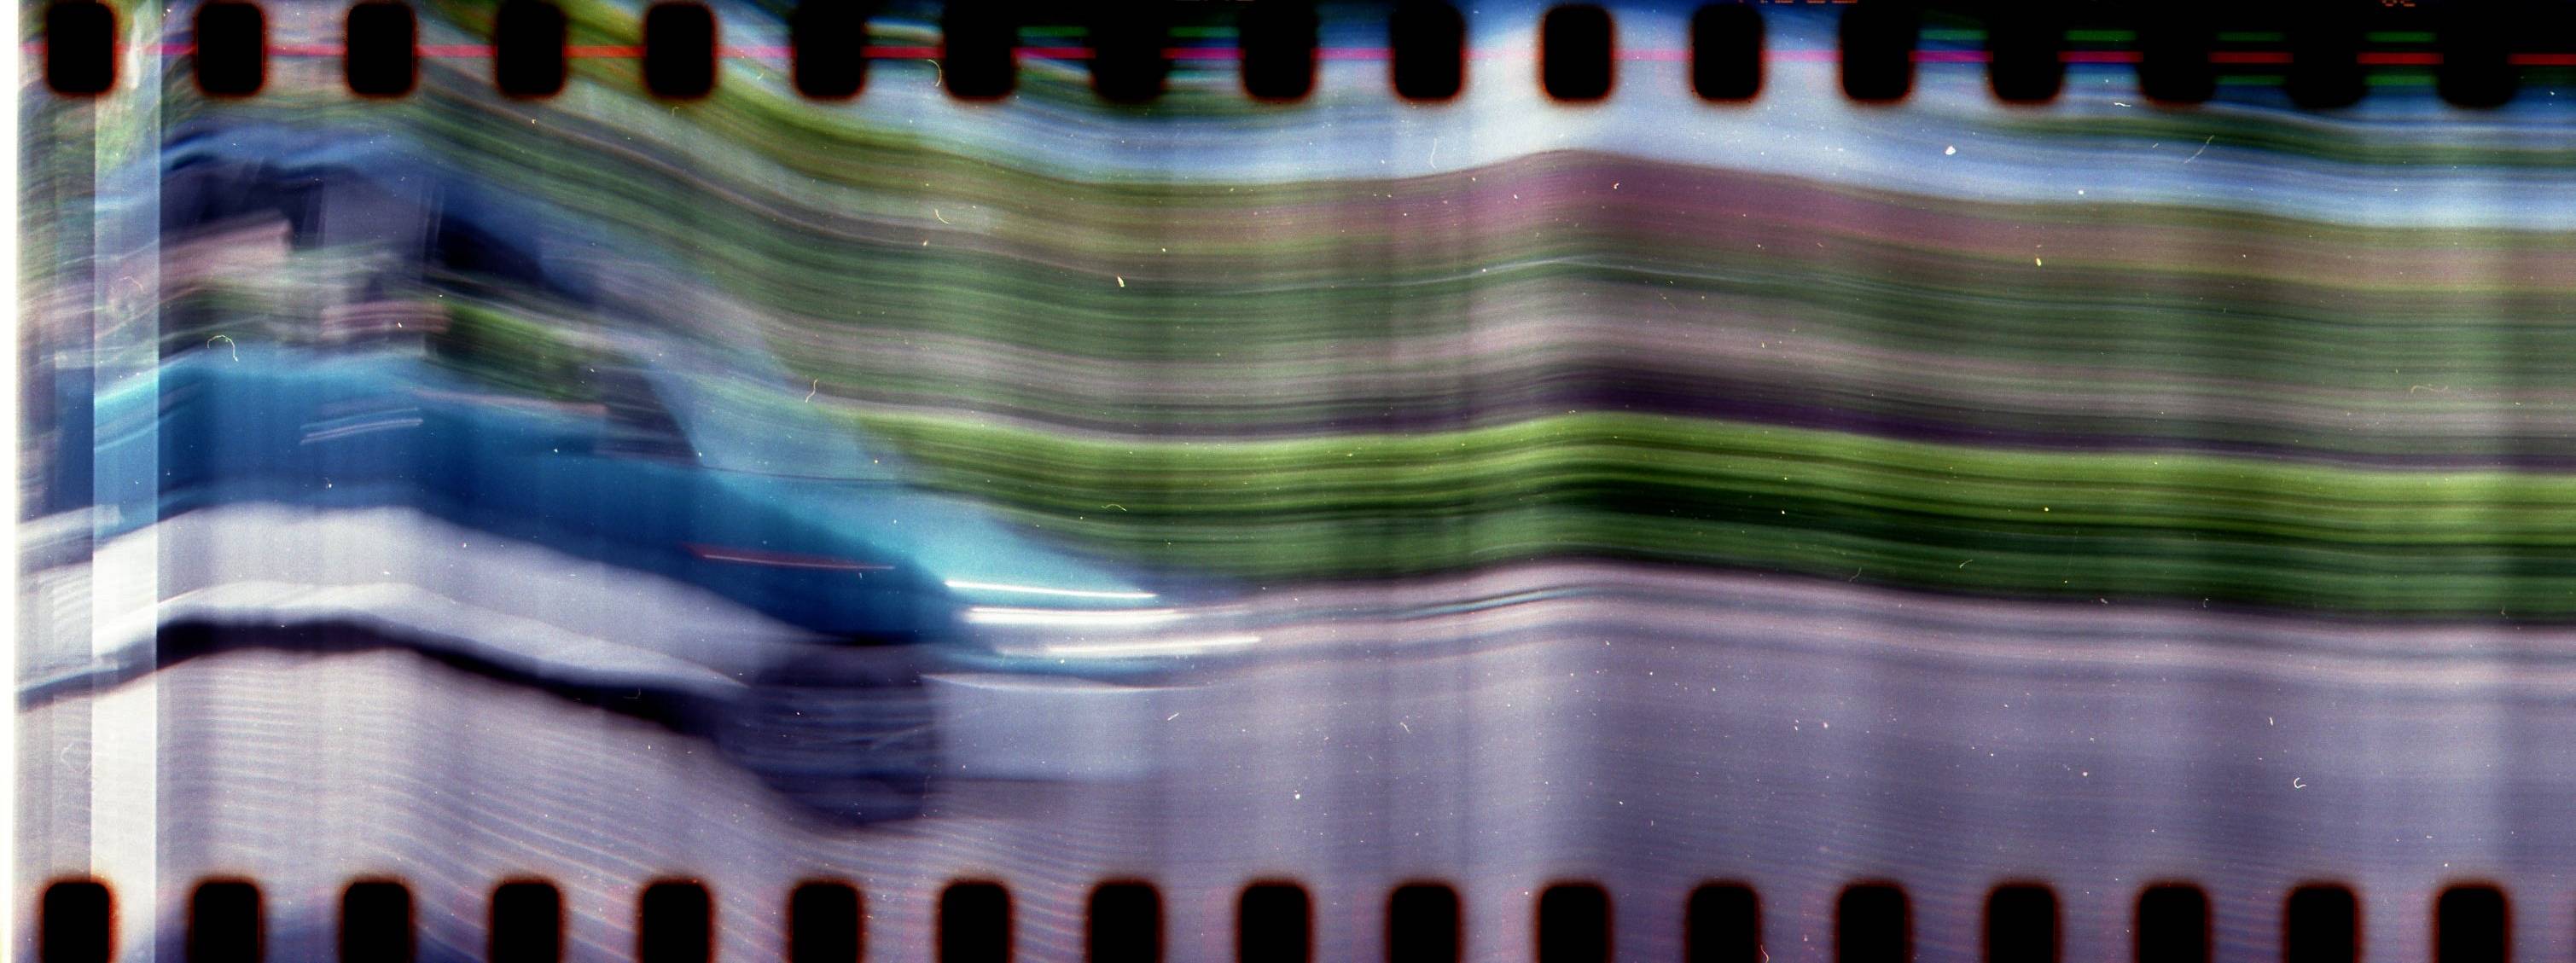
Some time ago, I ran into the phenomenon of slit scan photography. A slit scan camera does not have a shutter, rather it only has a small slit that lets in the light continuously. If the film doesn’t move, a narrow strip of the film will be very overexposed. If you pull the film along the slit, the film will be normally exposed. You will take a picture of the same narrow bit of reality which sort of repeats itself again and again. Everything will still be a blur, but things that move along in the opposite direction of the film will be shown like that in a normal picture because a new bit of reality will be exposed every moment.
Fun fact: the *Lomography Spinner 360°* is also a slit scan camera but because the film and the camera both move in opposite directions, the Spinner image looks normal. Take a picture with the Spinner while holding the body in the same position, and you’ll get the slit scan striped effect. I’m not very good at this so-called time scan, but saidseni has some excellent examples.


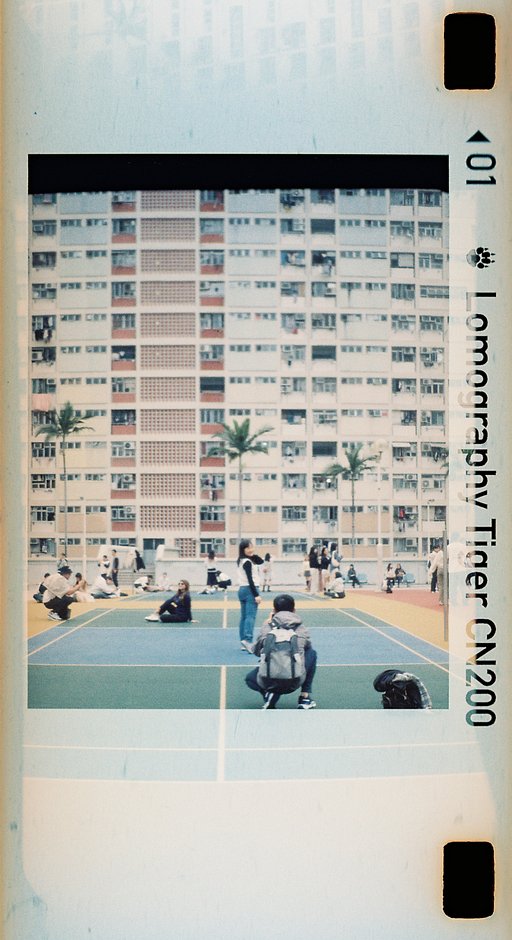
This technique was used to make “finish photos” back in the day since you can make an image of a specific location over a period of time. For instance, the finish line from just before the first horse finishes, to a few seconds after. So this picture does not shop 15 meters of track, but only a very small bit but was done over a period of 5 seconds or so.

Anyway, enough with the technicalities, on to the fun part: making our own slit camera! It’s actually really simple.
What you need:
- A simple focus free/fixed focus camera: check your local thrift store, or re-use a single use camera
- An empty soda or beer can
- Tape
- Small screwdriver
- Sharp knife

1. First, you need to remove the shutter from your camera. It’s not too difficult: screw the camera open. Screws are often located in the rewind crank, and inside, where you put the film. Pull off the front of the camera. Some small items may fall off (like the shutter button) but don’t worry, these are usually pretty easy to put back again when your screw everything back together. Next, screw off the plate that holds the lens. Behind this will be a small paddle, this is the shutter. Just pull it off. Now screw everything back together, taking care to put all the fallen off bits back in place.
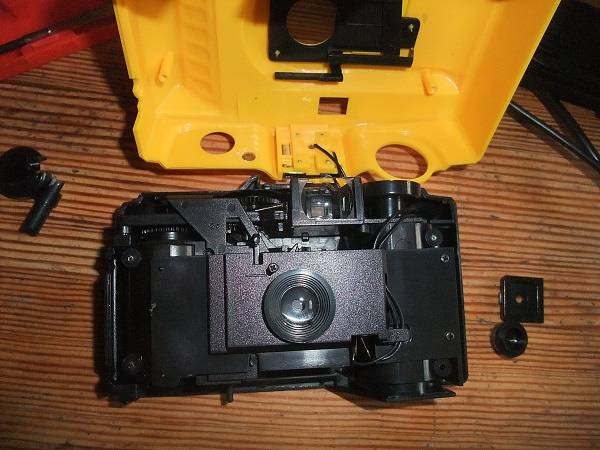

2. The next (optional) step is cutting two notches out of the camera mask. This way, you’ll expose the sprockets as well, and who doesn’t like exposed sprockets, right? Just a notch in the middle of the mask, where the slit will be is enough. Careful though, there might be bits of mechanism or flash wires hidden beneath. Also, you could create unwanted light leaks. A bit of black tape always works miracles if you cut too deep. I forgot to take a picture of this step, so here is some Paint art.

3. Lastly, we’ll make the slit. I cut out a bit of aluminum so it would fit the camera mask. Then I snipped it in two. I cut out two corners to make room for the advance mechanism and taped both bits of metal in the camera with a narrow slit of about half a millimeter between. Make sure the metal is nice and smooth, no sharp bits sticking out.


And that’s it! Your slit scan camera is ready to use. Time to hit the street. Well, first load up some film, cover the lens, and shoot and wind the entire film. We want to pull the film along the slit in one smooth, continuous movement, and we’ll do that by rewinding. So shoot up the whole film in the dark, push the rewind button, and now you’re ready to go.
Find a spot next to a road, put your camera in a steady spot (I placed my camera on a small wall next to the road) and wait for a car, or cyclist or something. It has to be something that moves in the opposite direction of your film. So if you pull your film from left to right, the car should go from right to left.

Try to wind as even as possible, if you stop the film, or slow down too much, you’ll get white overexposed vertical stripes on your picture. If you stop between shots, you’ll get the same white stripes between shots that also separates different Spinner shots.
It took me only a few shots to fill up a roll, and it takes a bit of experimenting to figure out how fast things should move to get captured the best, but the results are pretty cool I think. I’m looking forward to seeing your slit scans!


written by stratski on 2014-07-31 #gear #tutorials #camera #tipster #modification #hack #slit-scan #timescan #camera-modification #select-type-of-tipster #select-what-this-tipster-is-about #requested #finish-photo


5 Comments