Recesky DIY TLR Camera: Awful First Date, Love at First Try

22

My personal rough start with the plastic 35mm TLR from Recesky, that made a pleasant dream come true. A true Lomographic experience, from start to finish, as you literally have to build the camera first.

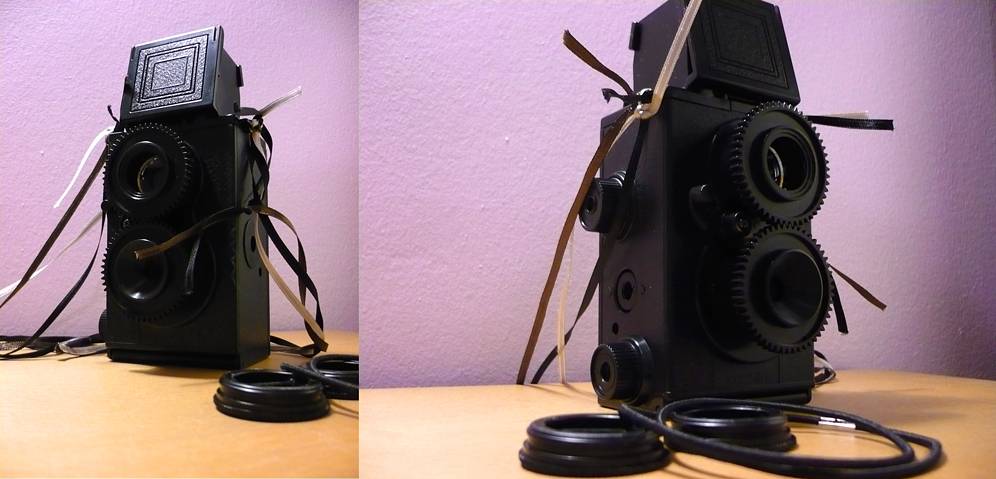
I’m not going to lie, it was hard, and stressful and I felt like quitting a couple of times… It should have been easier though, going by the few reviews I was able to find online. I got it done in the end, had to use a bit of glue here and there… and voilà: I had my own personal plastic TLR camera, and I couldn’t be happier with it. It was worth every pain. To be fair, I think part of it was a bit of clumsiness on my part, and my amazing ability to get stressed with the most simple tasks.

Also, I honestly believe I got a faulty kit, because the easier part of the assembly, screwing in the lenses, became a nightmare. They were too tight and weren’t screwing in properly (I got blisters on my fingers when trying hard to fit them in place). By the time I got to this point I had already had to use glue, so I wasn’t getting my money back, I thought ‘whatever’ and spend a good hour and a half sandpapering the lenses outside screw indentations, and went as far as using lubricant (the cuisine type) to get it to slide in properly. It took effort, but again: It worth the effort.

After all the hassle of assembling the camera, I had lost my entire Saturday to the thing (with several breaks in between to get my nerves settled a bit) and I had no idea how I could test it without film easily available on a Sunday. I eventually found an overpriced store that had the 400 ISO film the package recommended and, with my fingers still a bit sore from the previous day, I went about testing the little beauty that had pained me so.

I tried focusing it close.
and I tried it focusing it to the infinite.
I tried multiple exposure.
and I tried it at dusk.

I was blown away with the results. It was my first analogue film experience and I seriously wasn’t expecting such good results. The 400 ISO colors surprised me a lot because they were so vivid, and I had just bought whatever had been available. The lens blurred on the edges, along with the black corners on close ups. It was everything I had hoped for. It made all the pain totally worth it.

The camera’s “do it yourself” kit is available at a very cheap price on e-bay (I chose a British distributor to avoid trouble with customs). I spent around 18€, shipping fees included. If that isn’t a bargain for such a lovely little toy than I’m not sure what is. And I honestly believe that in most cases the assembly is easy and without trouble.

You would think that with such a cheap camera you wouldn’t have many options except point and shoot, but that isn’t the case here. The twin lenses aren’t just for show, as you can easily focus objects from a 50 cm up to 3m and then infinity range. Below you can see the viewfinder and how the picture looks—-they look very sharp when focusing at the correct distance. There’s a little thing that isn’t obvious in the instructions but that is very important: both lenses must be aligned to make sure that what the viewfinder shows is what you actually get. There are two very small dot marks in each lens that must be aligned before screwing them in. I realized this almost too late (I got in on time though).

Also you can experiment with multiple exposures as the film sliding is all manual. There are also a few twists you can add by either using what they call the ‘twist plate’ or not using it, and depending on its position regarding the lens. They are subtle changes but that can be easily explored. I read somewhere that taking out this twist plate changes the regular aperture of f11 to f5. The shutter speed doesn’t change though. It’s approximately 1/125 (although you can twist it slightly to bulb by holding your finger in the right place. It requires some training though.)

There are also some neat online tutorials about little extras you can add, such as an actually working flash hot shoe or a cool DIY lenses’ cover.

I got so happy with it that I’m also completely obsessed with this little girl’s sister: the Recesky 3D Stereo Pinhole camera, also a DIY camera (although this one looks a lot simpler to assemble due to its boxy and non-complex structure.). As soon as I have tried it, I’ll be sure to leave a review and examples of it in here. One of the things that bothers me is how there is so little attention bestowed upon it when it looks so ripe with possibilities. It’s pinhole, which is in itself great, but not only that but it allows for panoramic views, and…. I’ll let you know more as soon as I have it with me :)

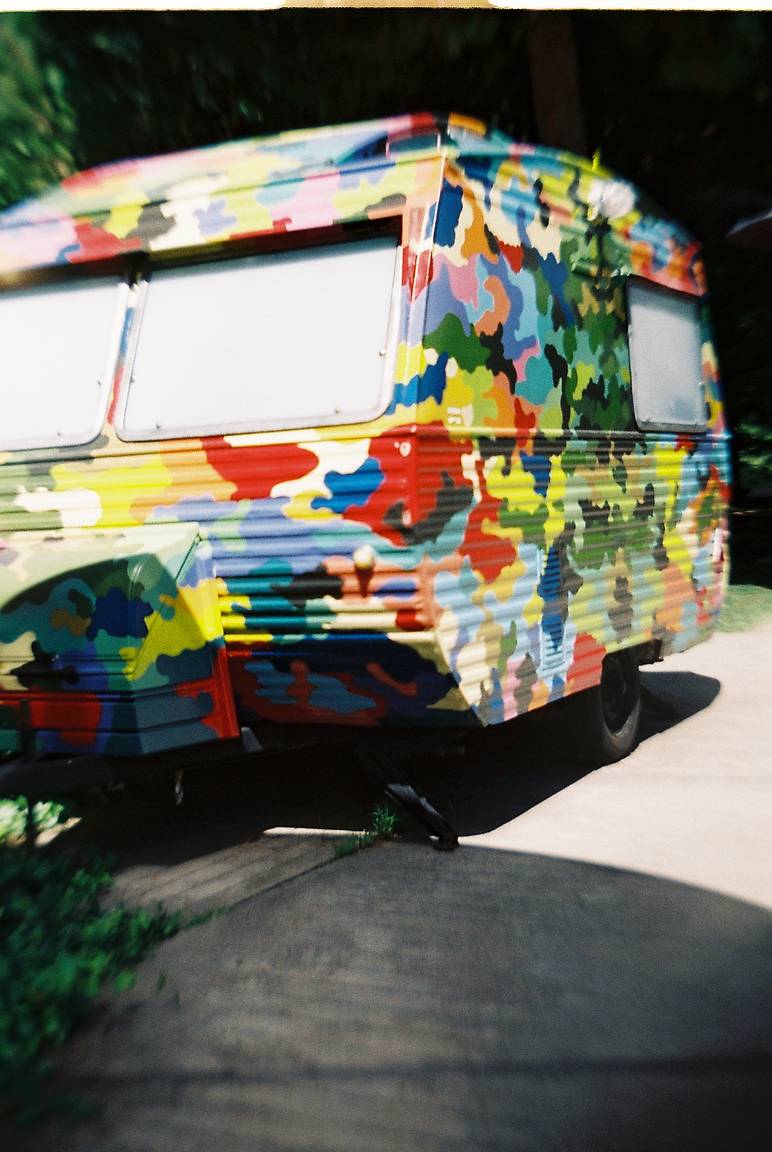
This is about the TLR though…so, here, I’ll leave the rest of my Fujifilm Superia X-Tra 400 film for you to enjoy. As you can see most pictures turn out to be vertical as it isn’t an easy task to shoot a horizontal picture and I’m still not sure about how it will come out.

written by blablabla-anab on 2011-10-03 #gear #diy #35mm #review #dreamy #plastic-camera #lomography #tlr #trouble #recesky #user-review

22 Comments

  1. sorrilha
    sorrilha ·

    Ainda este fim de semana estava a ver uma para mim...

  2. danbarry
    danbarry ·

    I bought one but couldn't use it as the sprocket wheel (next to the exposure area) wouldn't pick up the film once loaded. I thought it was a design flaw and therefore a rip off. So never used it (wasn't bothered i only paid £5 for mine and was happy to have build it, which i really enjoyed. After seeing your results might see if i can 'fix' it. Sorry to read yours was a bit mis-shapen, other than changing the recoil on the spring mine was really wast to fix together. Keep snapppin!

  3. blablabla-anab
    blablabla-anab ·

    @ sorrilha:
    Aconselho vivamente :) Go for it!!

    @ danbarry:
    There's a known issue with this camera: It has a little spring inside the top wheel that pulls the film, so sometimes you have to keep rolling until the spring is tight enough to start pulling the film, and then you have to press the back lid with your thumb in order for the fillm counter to actually roll along with it.
    Some people actually put a little card or paper inside the backlid to make the fit tighter.Just pressing with my thumb has worked for me. I hope it helps you (or maybe I completly misunderstood the issue)

  4. sedgetone
    sedgetone ·

    @danbarry, I put a white sticky label on the inside backplate that covers where the vertical fins (for want of a better term) are. This seemed to help a lot with the winding issue, as blablabla-anab points out press on the back. I also painted the little arrows on the film pointer white to make them easier to see. The Recesky TLR is my second favourite camera, first will still be my LC-A+.

  5. odax
    odax ·

    Yeah, masking tape on the inside made mine work way better, except I got a few light leaks. Also, the film counting mechanism on mine broke after a few weeks, I had to take the whole thing apart to replace one tiny little screw. Oh the HORROR.

  6. blablabla-anab
    blablabla-anab ·

    @odax Well I had to superglue part while I was assembling because the little plastic things for the screws broke, and they were that tight... but in the end it turned out awesome. It's still one of my favourite cameras, and i find that gentle is the key!! hope yours got better again :)

  7. gm_mcleod
    gm_mcleod ·

    I couldn't seem to get past putting the shutter parts together. The screws wouldn't go in far enough, then part of the plastic broke. Now it is no good! I finished putting it together, using very few screws, my fingers are sore, but it looks good sitting on my shelf with the rest of my cameras.

  8. blablabla-anab
    blablabla-anab ·

    @gm_mcleod sorry for the delay. I had loads of trouble with the shutter part because i couldn't figure how the 'twisty metal thingys' (forgot the name at the moment) would fit. I had to browse online and only when I saw the chinese instructions did the drawing actually made any sense. I also had some plastic that broke, I had to super glue it. My screws went all the way though.
    It's a pity yours didn't end as well. I find it a very pleasurable camera to work with and am never disappointed with the pictures (unless i try self portraits :).. Maybe in the future you'll try again, or you can try and buy it already put together. The four corner store as it available like that, and i think some e-bay sellers had it too. Hope you won't give up. Hugs*

  9. mikeydavies
    mikeydavies ·

    i made one it rocks!

  10. luisfernandes
    luisfernandes ·

    tentei fazer o hotshoe... falhei miseravelmente....

  11. blablabla-anab
    blablabla-anab ·

    @mikeydavies: GREAT :) let me know how it goes. I love mine, but it's satying put during the winter.

    @luisfernandes : awwwww, que pena! Eu nao arrisquei pois tive alguns problemas ao tentar montar e nao quis arriscar desmonta-la. Mas nao desistas da máquina, pois vale a pena o esforco. :)

    Thank you all for reading :D

  12. meowcat1911
    meowcat1911 ·

    I just finished making mine. Initially finished it then realised the sprocket had fallen out -.- after working on it for a good 2 hours grr. Managed to get it back in without too much hassle but it seems to be quite stiff and hard to turn? I'm assuming it's not supposed to be that difficult to turn it. Anyone have any ideas why it might be so stiff? Would like to make sure it's okay before loading film.

    Thanks :)

  13. blablabla-anab
    blablabla-anab ·

    @meowcat1911 (Sorry for the delay in my reply) I'm so glad you went and bought one. Try it in black and white (These were my results: www.lomography.com/homes/blablabla-anab/albums/1781463-11-r… :)
    About your problem, yes the turning wheel is supposed to go very smoothly. Not sure if you fixed this issue already or not, but if it persists then try opening it again and try and figure out what is causing the friction. Not sure I understand very well what happened so I'm not sure I can help you more. Maybe if you give me more detail? Good luck!! Thank you for reading and letting me know :)

  14. neurodiaz
    neurodiaz ·

    @blablabla-anab Hi! I have a problem, I only see a circle thought my viewfinder, I wonder what should I do to see the whole image projected :(.

  15. blablabla-anab
    blablabla-anab ·

    @neurodiaz Hi, hmmmm, I'm not sure what the problem really is with your viewfinder. Have you tried it differetn lights? Sometimes in a certain type of light not all of the 'screen' will be clear and only the center area will be showing information. If you look at my picture of the viewfinder above you'll see that the black corner effect is very strong and almost looks like only a circle is visible. Is your circle smaller? You should check if your mirror is glued properly, or if your upper lens has any extra bit of plastic that shouldn't be there. Not sure this helped, but I'm not sure what the problems is. If it persists send me a private message and I'll try and show you some pictures of how the camera is supposed to look like. Hugs and thank you for reading!!

  16. joaomiguelsantoscunha
    joaomiguelsantoscunha ·

    Olá. Eu ando a pensar arranjar uma destas para mim, achas que vale a pena? se poderes da-me alguns conselhos. Obrigado :)

  17. blablabla-anab
    blablabla-anab ·

    @joaomiguelsantoscunha Olá!!!! desculpa o atraso na resposta :( SIIIIIIIIIIIIIIIIIIIIIIIIIIIIIIIIIIIMMMMMMMMMMM!!! eu adoro a minha. O processo de montagem, no meu caso foi um pouco atribulado, mas conheço imensas pessoas online que não tiveram qualquer problema. Há bastante informação disponível sobre esta ou a Gakken (são praticamente iguais). Eu adoro a minha. É super leve, pequena, tem imenso charme, é fácil de usar e eu adoro os meus resultados. Só não tenho usado mais porque o tempo no inverno aqui é mais escuro e não tenho luz que chegue, mas deves definitivamente experimentar. Eu recomendo vivamente :) Depois deixa-me saber se compraste uma ou não ^_______^

  18. joaomiguelsantoscunha
    joaomiguelsantoscunha ·

    @blablabla-anab comprei sim, e admito que a montagem foi relativamente facil com as imagens e explicações em inglês. E experimentei pela primeira vez no outro dia, fiquei super surpreendido pelas imagens. usei um rolo Fujifilm 200 num dia nublado, mas as fotos ficaram muito boas para um primeiro ensaio. se puderes espreita: www.lomography.com/homes/joaomiguelsantoscunha/albums obrigado pelo conselho, é uma câmara fotográfica super barata que vale a pena. admito que no inicio estava um pouco ceptico

  19. blablabla-anab
    blablabla-anab ·

    @joaomiguelsantoscunha ^___^ Já vi. Estão óptimas :) Ainda bem que estás satisfeito. Estou agora super orgulhosa que a minha experiência contribuiu para a felicidade analógica de mais alguém!! :)

  20. rik041
    rik041 ·

    i bought this cam some days ago...thxs for youre recebsion rik

  21. schlogoat
    schlogoat ·

    This is a great article. :)
    I buiilt mine, and it didn't take long, and I enjoyed it, but my focusing isn't really working. I've scoured websites for help and I've checked its built right but still the same- there is no discernible difference in focus on the screen when I turn the rings. I didn't know about the dots on the rings, so I've aligned them, but still no change. The only way I can get anything in focus is to have it about 30cm away!

  22. bunburyist
    bunburyist ·

    As usual, I am arriving late to this party. Anyone know where I can get a Recesky 3D Stereo Pinhole camera? Nobody on ebay seems to list them, which is really odd for them. Any help would be appreciated. thx

More Interesting Articles