Lomography Tutorials: Adjustable Jawbone Camera Strap
10 Share TweetEasy-to-make, stylish, and durable. These are the things that we're always thinking about when we're making our craft tutorials. We want something that you can easily create in your spare time that serves both aesthetic and functional purposes. This one is fairly easy if you've been following our tutorials but as we always say, practice makes perfect so don't be afraid to get those hands dirty! We give to you the adjustable camera strap in the jawbone pattern.
Here are the material's you'll need...

- 6 ft (182.88 cm) of 550 paracord (white)
- 6 ft (182.88 cm) of 550 paracord (orange)
- a cigarette lighter
- a pair of scissors
- a small key ring or camera attachment strap
- ruler
- tape (optional)
Let's begin with the tutorial!
1. Start with your two paracord strands.
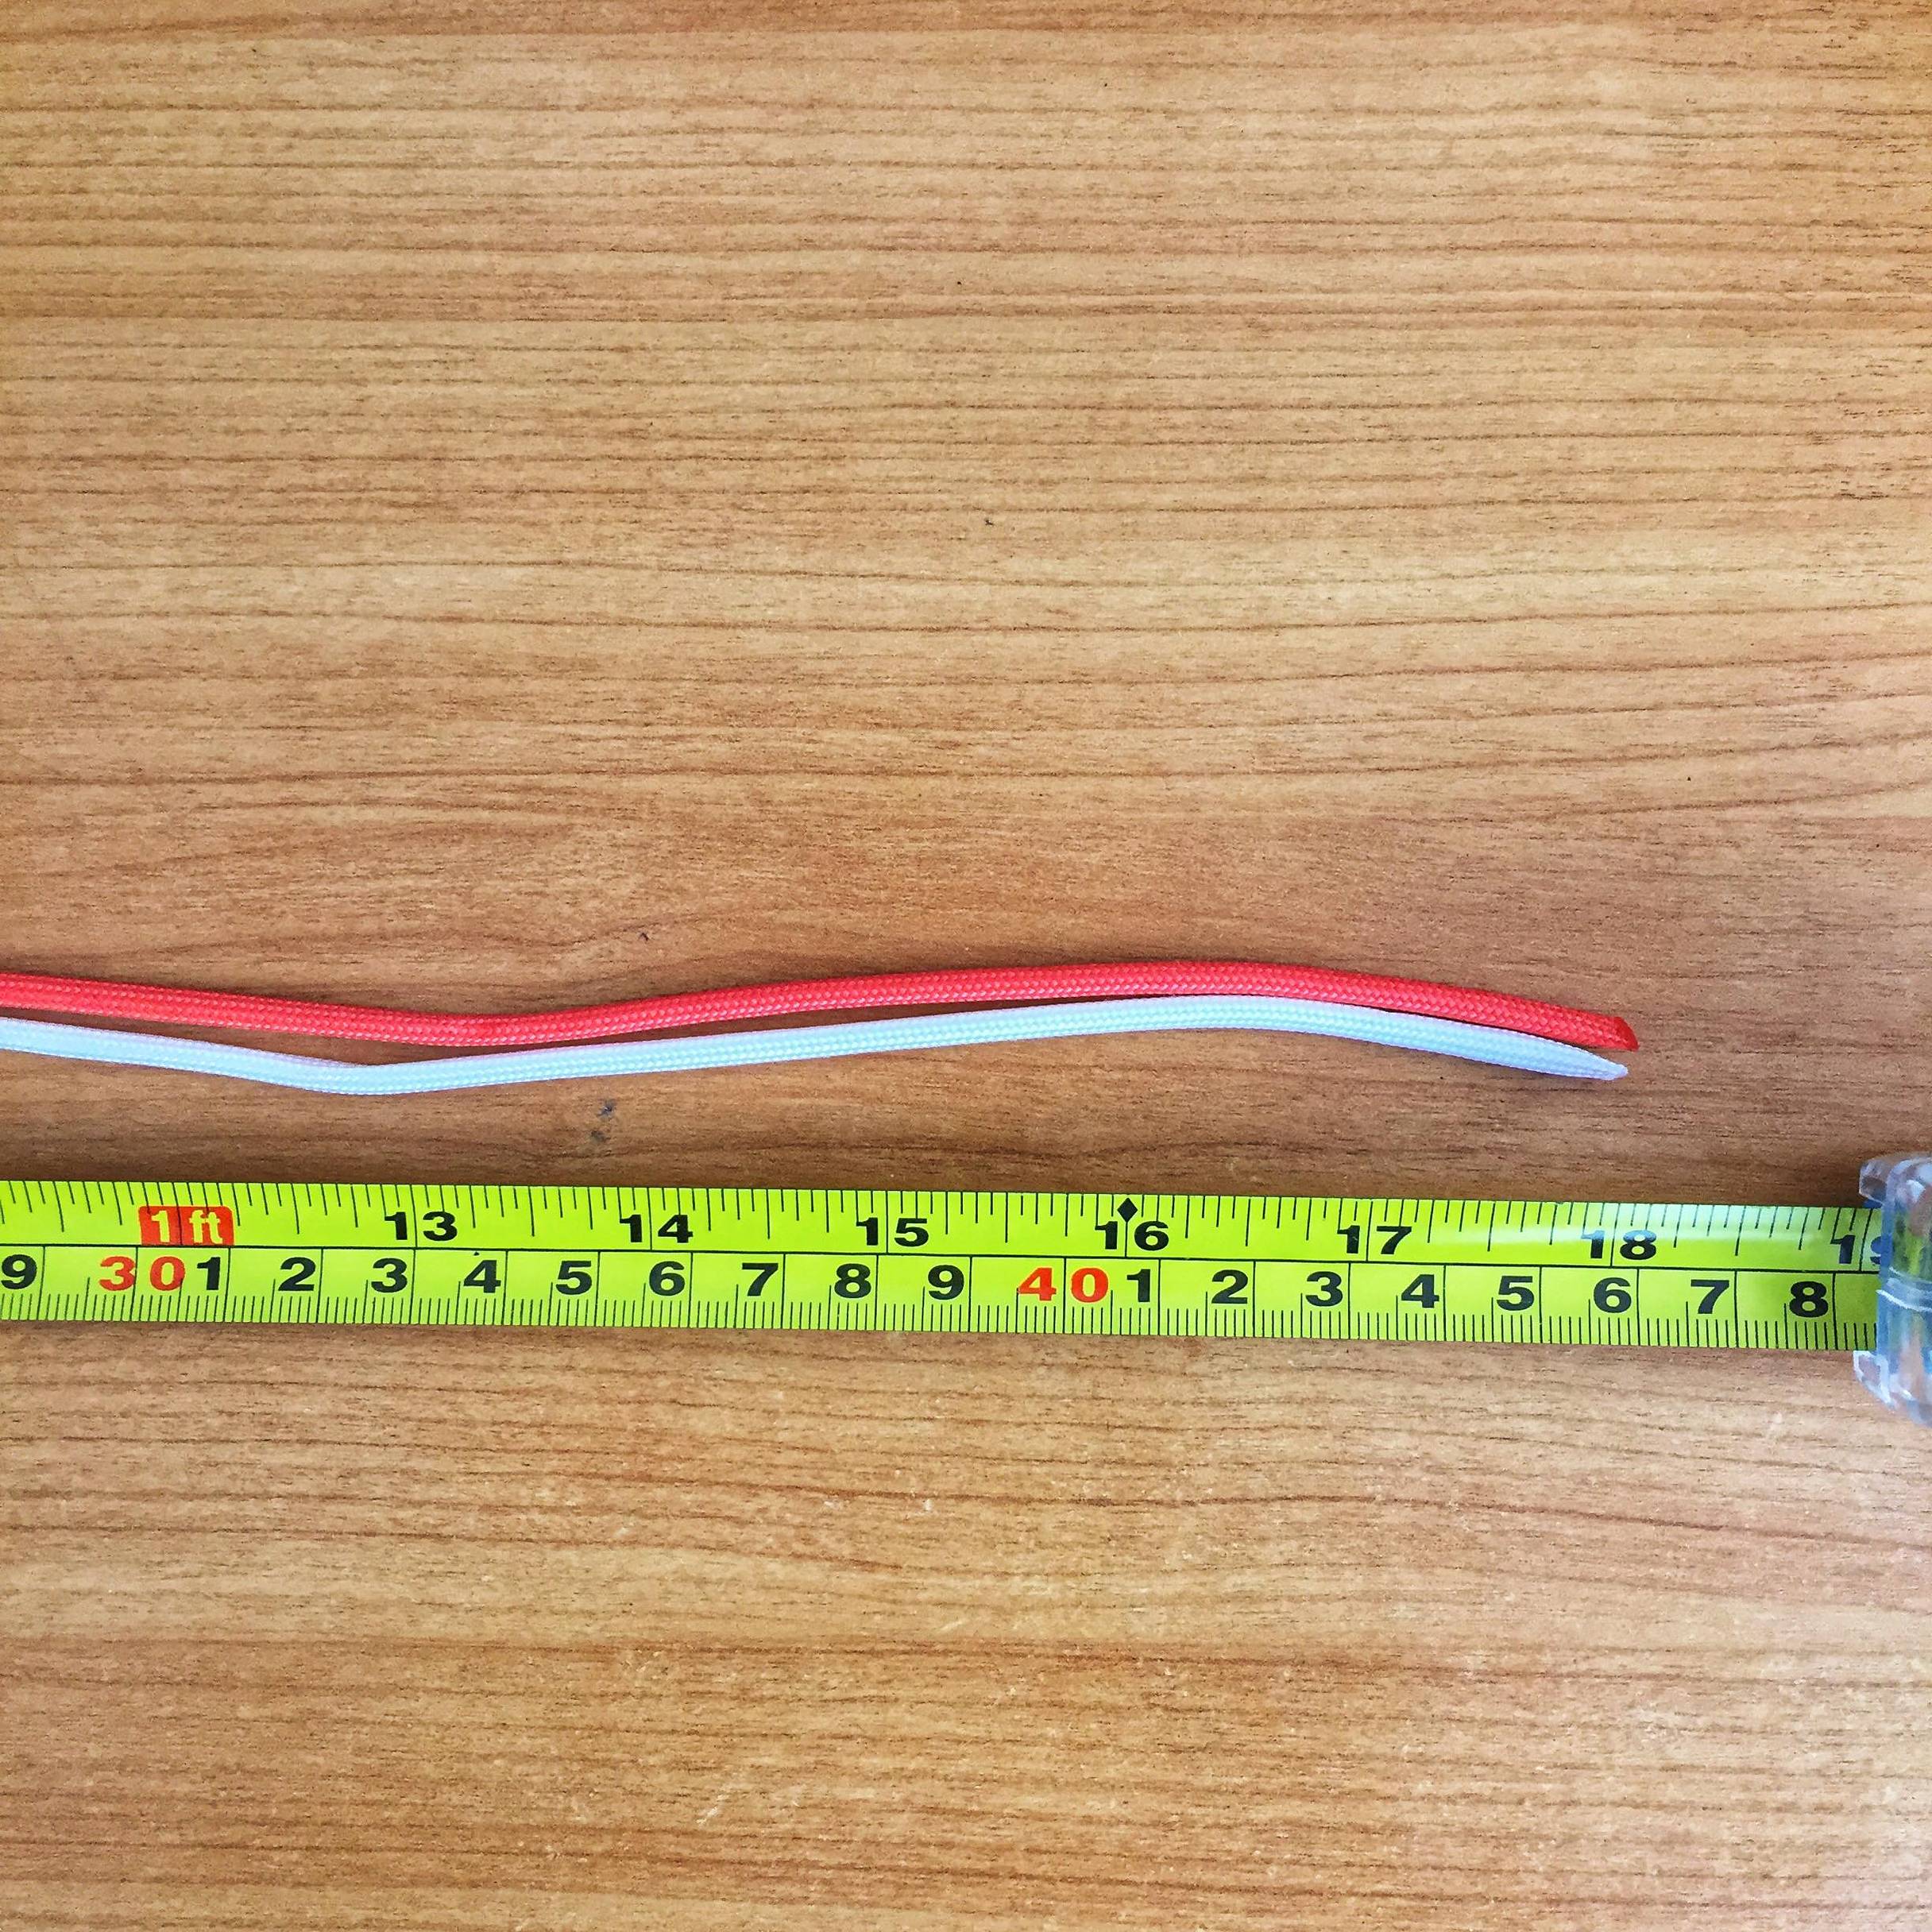
Measure it up to 18 inches. This length of cord will serve as the core of your strap.
2. Pinch spot where you're going to start your pattern.

Rule of thumb here is that you should be pinching the shorter length of your cords.
3. Do one pass of the cobra stitch weave.


This should be relatively easy if you've been following our tutorial series. But here's the quick run down. Take your right working strand and make a loop that goes to the left. Then take your left working strand, go over your right working strand, go behind the core and into the loop you created first. Pull both ends tightly to close the stitch.
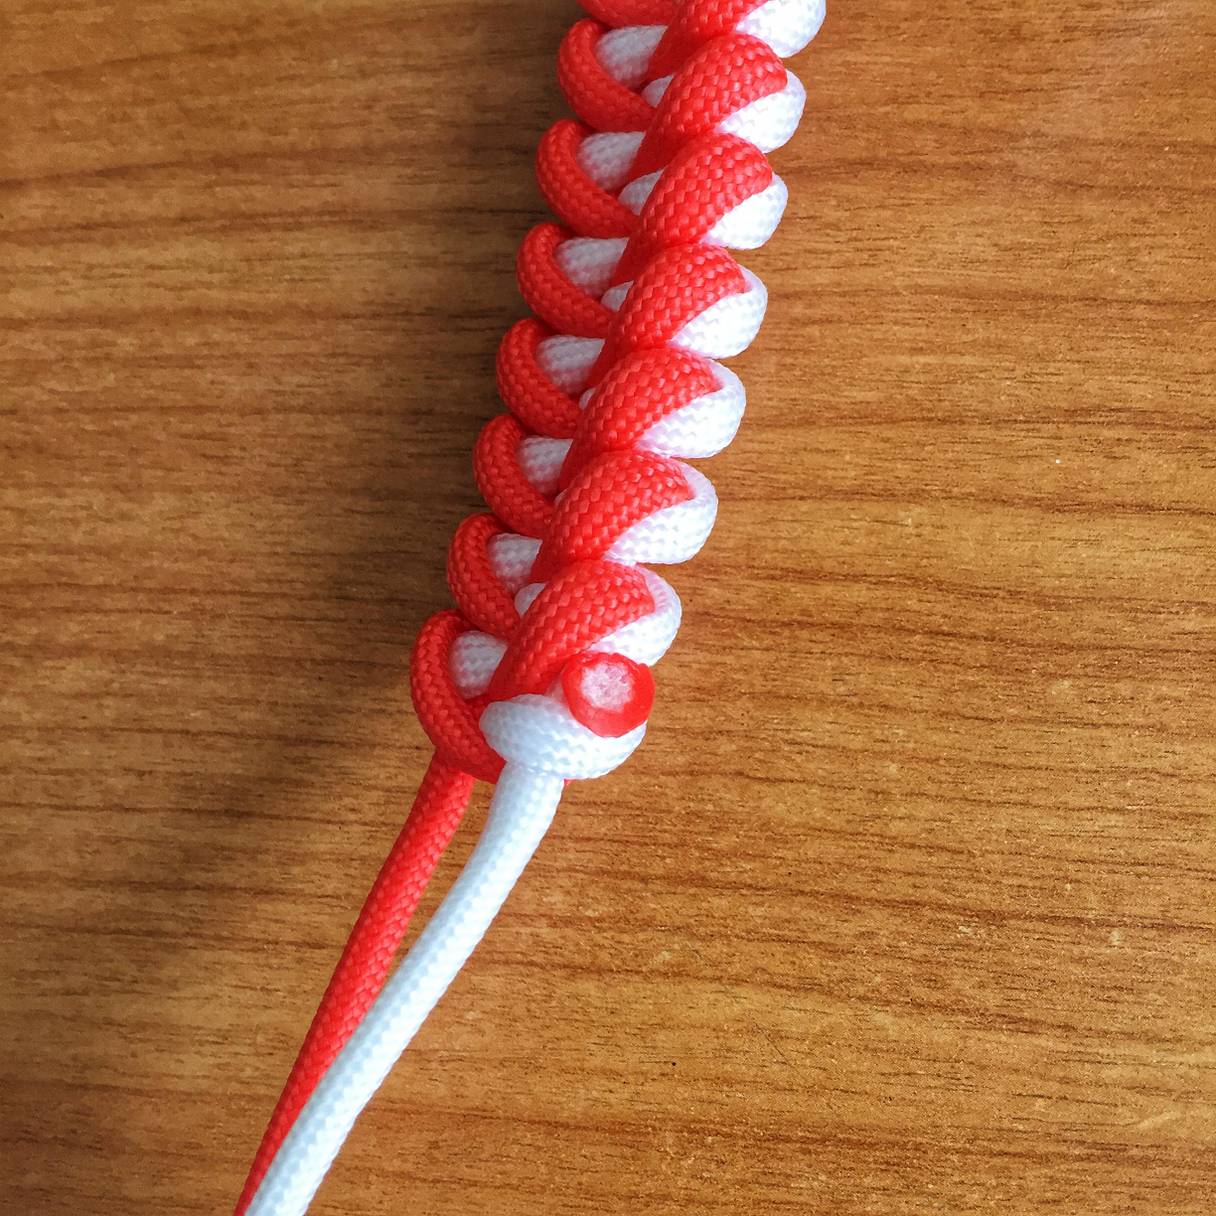
4. Create a jawbone pattern.

The jawbone pattern is easy to spot since it's quite similar to sharp teeth. To start the weave, take your left working strand and pass through the middle of your core strands. Take the right working strand and to the same thing but make sure you go over the first working strand. Still with your right working strand, thread it into the loop you just created on the left. Pull both strands to finish the weave.
5. Continue with the pattern.


Now that you completed your first jawbone weave, it's time to do another. This time you're going to start with the right working strand. Repeat step number four. The sequence is as follows, left strand, right strand and right strand, then left strand. It's an alternating pattern that's easy to remember after a few tries.
6. Continue weaving until you reach your desired strap length.

This strap is made for a 7-inch wrist diameter. When done right, here's what your strap should look like.
7. Snip and singe the extra length of your working ends.

Cut the working ends just right with your scissors and singe them with your lighter.
8. It's time to thread the rest of your core strands into the cobra stitch.


This is a bit tricky since you have to open the loops so you can thread your ends through. You can use needle nose pliers to open the loops and pull the ends through.
9. Take your ends and thread them through your key ring or detachable camera attachment strap.

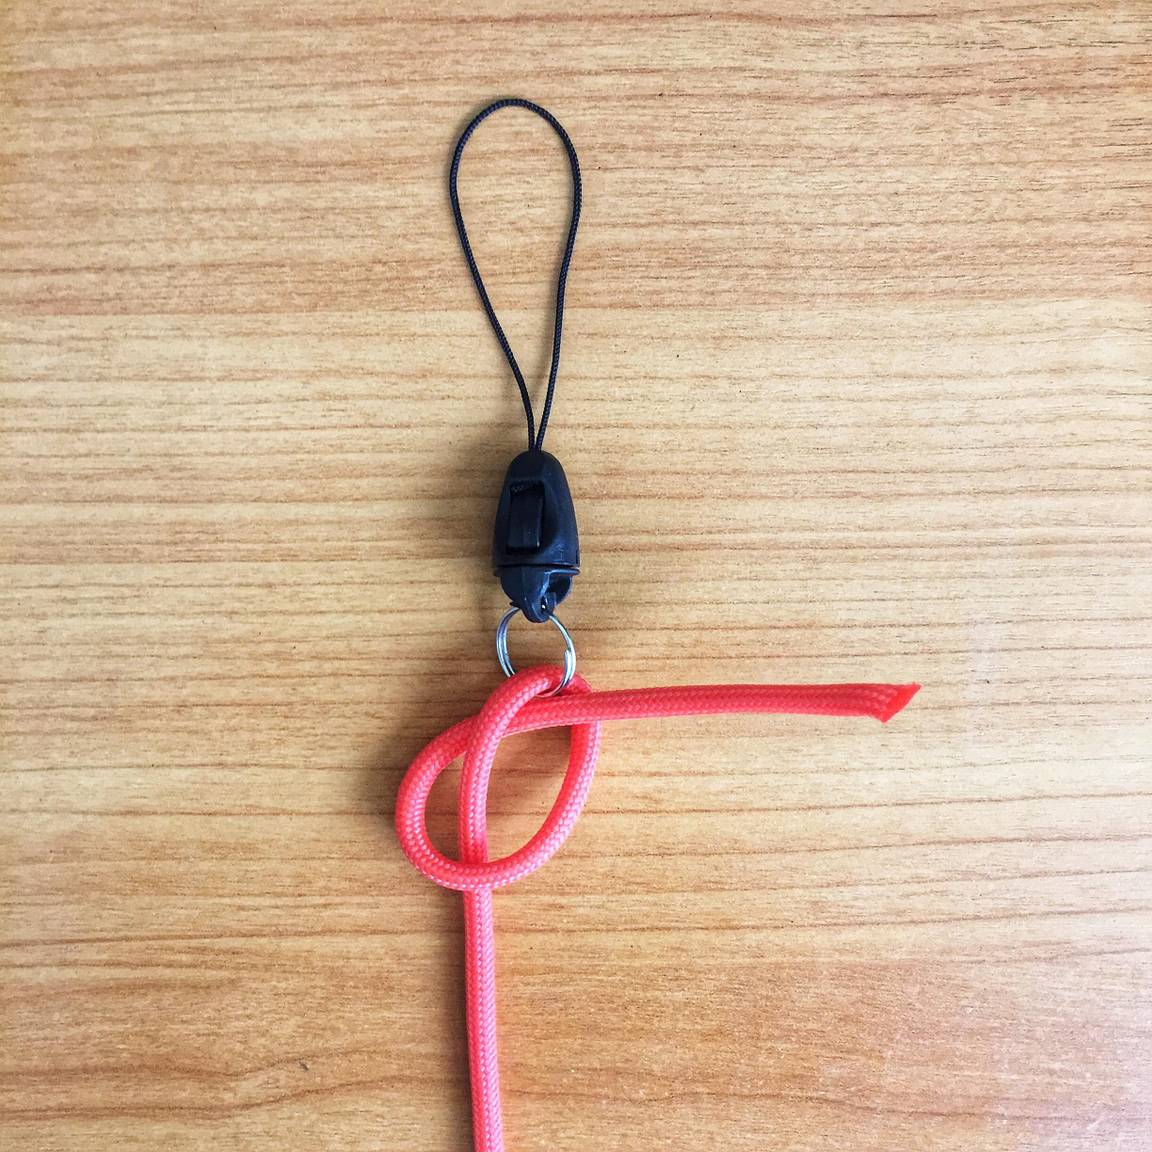

Start with either strands and create a loop. Take the working strand and thread it through the loop. Snip and singe the ends to close it.
10. And you're done!

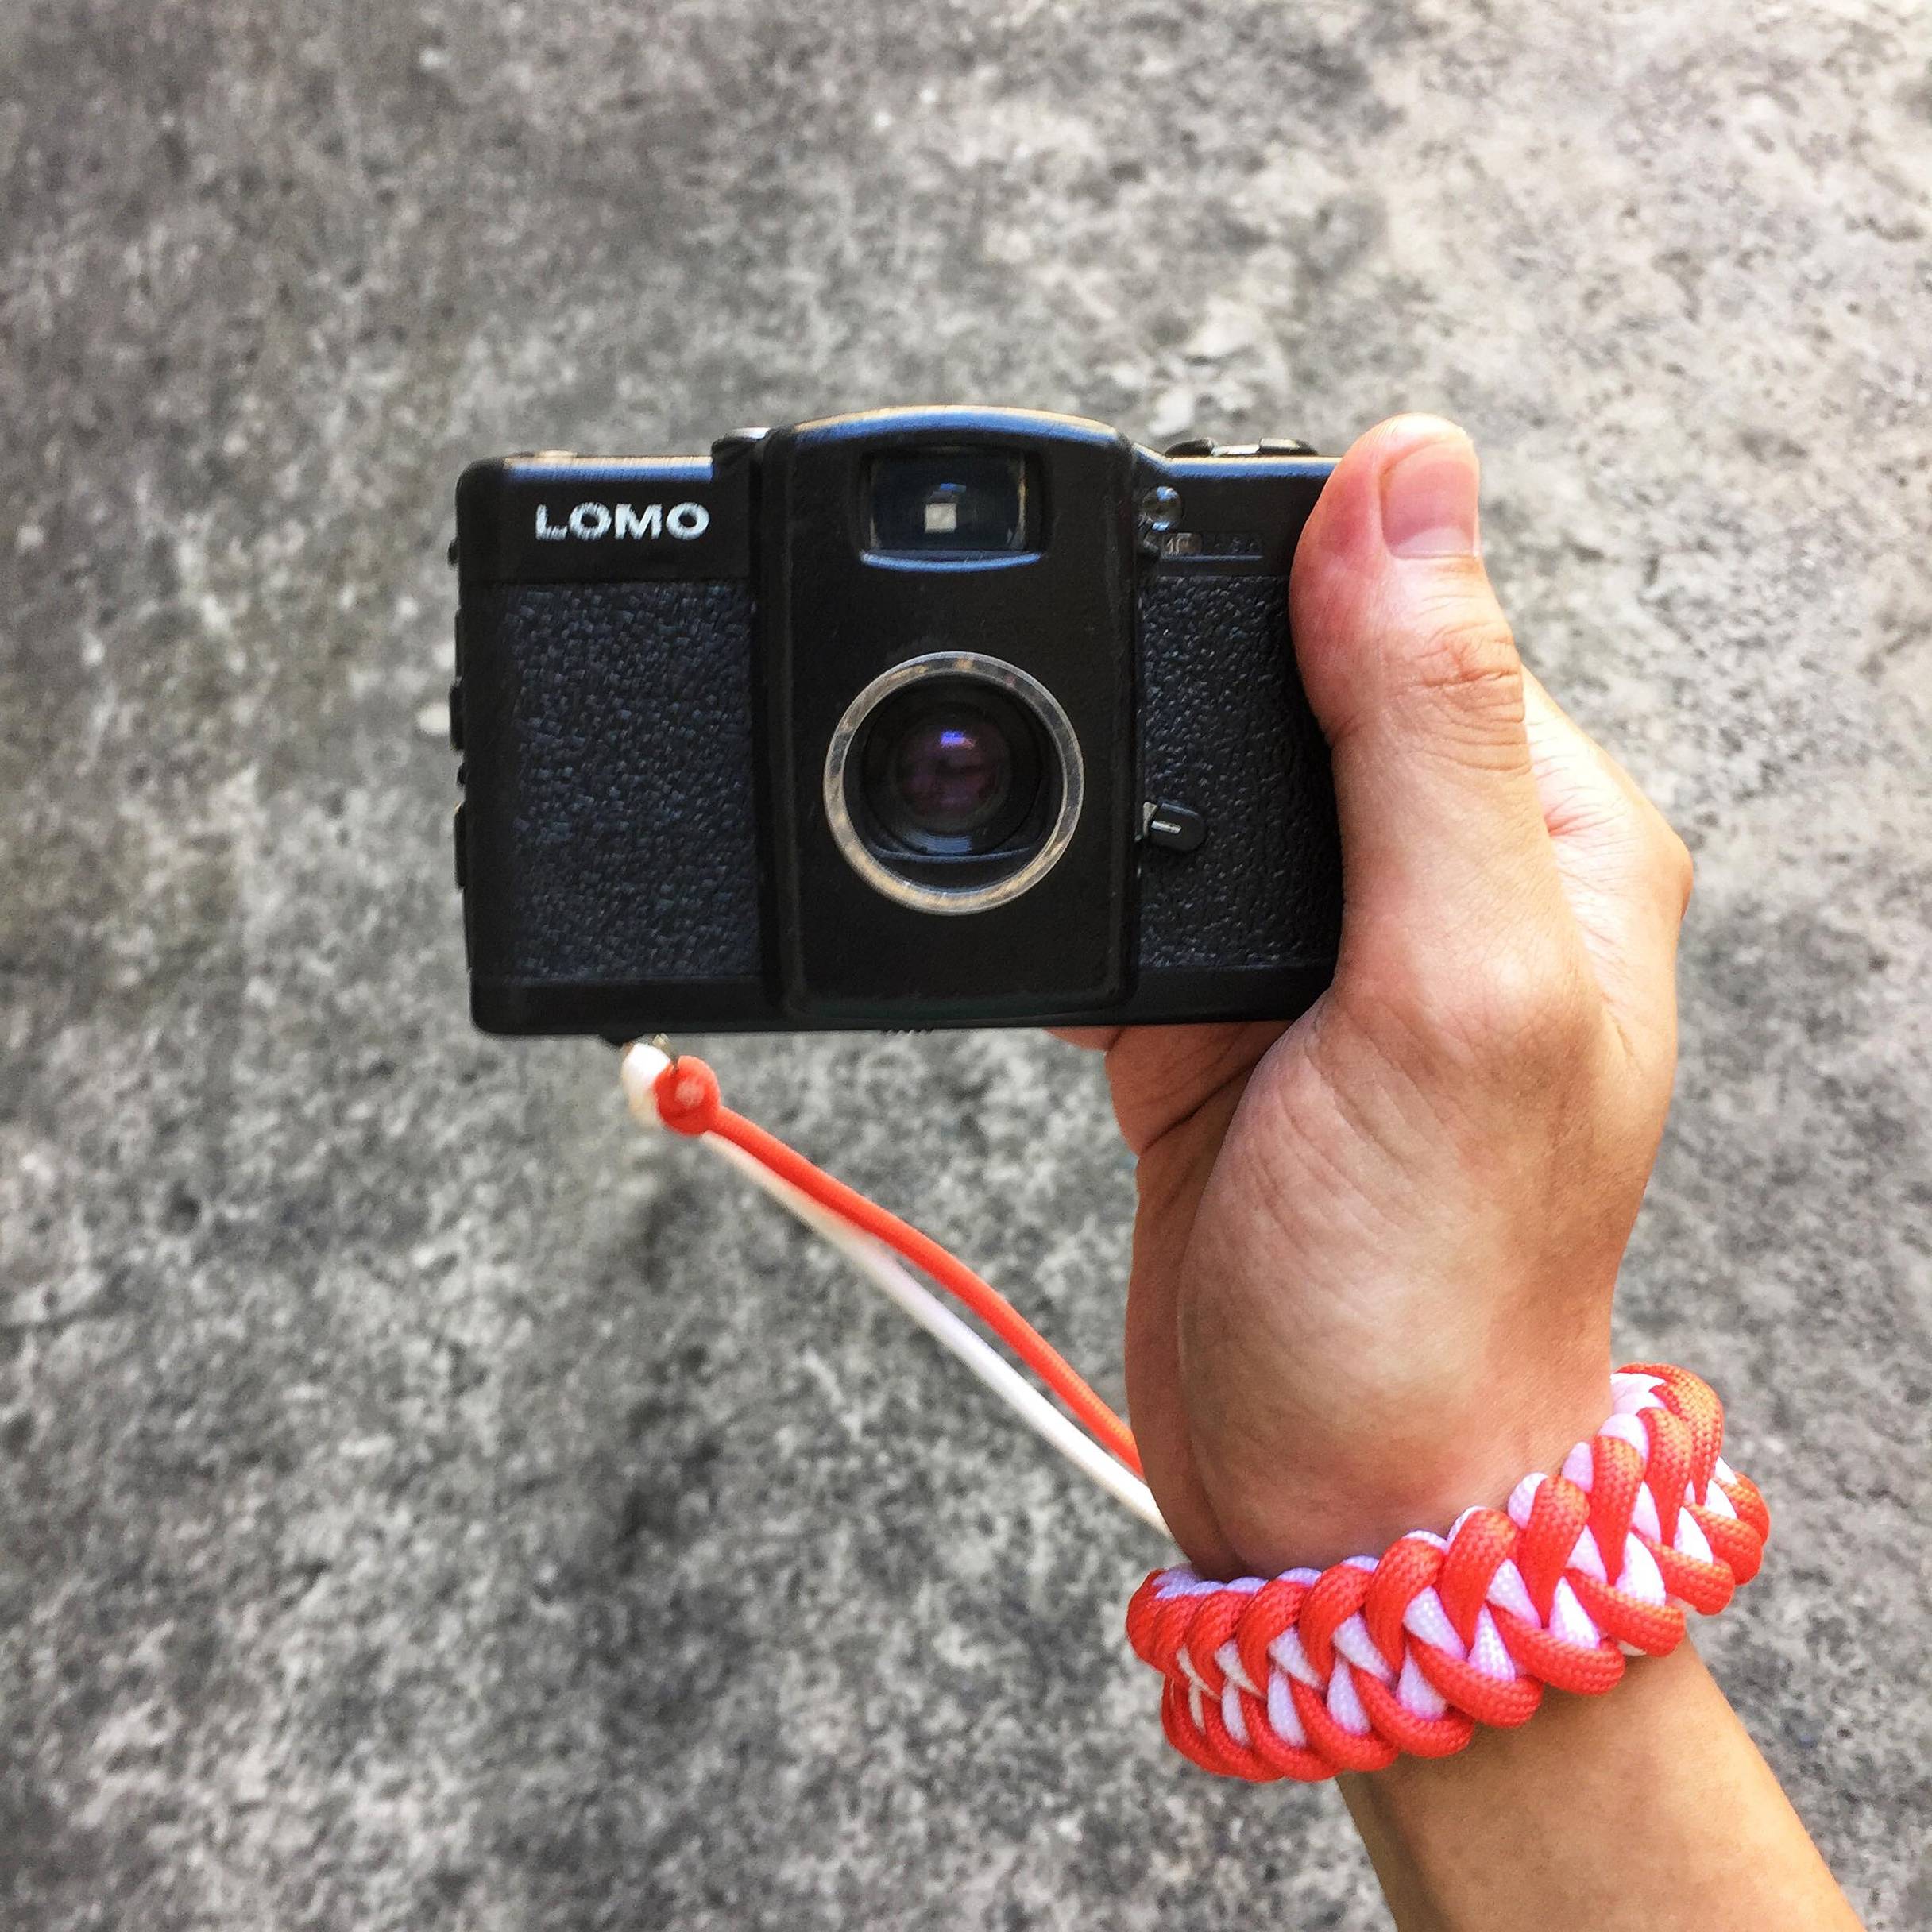
You just made a new adjustable camera strap for your favorite snapshooter. It's easily detachable (thanks to the camera attachment strap) so you can load/unload film or change settings on the fly.
Play around with color combinations so you can find one that best suits you and your trusty camera. Here's how it looks like when attached to the LC-A+ and the Konstruktor:


There you have it — another DIY strap for your camera. But if you're into other strap designs and colors, be sure to check Online Shop for a wide selection of camera straps.
Let us know in the comments section below if you'd like to see other similar tutorials. Share your finished projects if you tried making one, too!
written by cheeo on 2018-05-09 #tutorials #diy #craft #camera-wrist-strap #paracord


No Comments